Streaming Netflix on my Blu Ray?
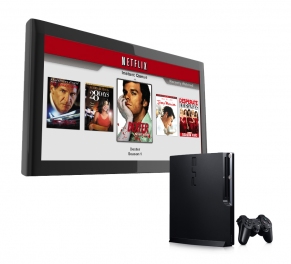
netflix_ps3_1Look, I’m just going to admit this. I don’t use my Blu Ray player very often. Most titles that are available on Blu Ray are large, new releases, and if I wanted to see them I saw them in the theater. I watch a ton of HD TV on my DVR. The indie films that frankly I hardly ever see in theaters anymore (sorry, business I work in, but my TV is awesome and your theaters are a pain in the ass) are almost exclusively available on DVD. I pay the extra money for Netflix to send me Blu Rays, but I only have a handful of Blu Rays in my queue.

But like a lot of Netflix subscribers, I’m getting more and more accustomed to the instant gratification of “Watch Instantly.” The selection is growing, and it’s a wonderful rogues gallery of films nobody wanted enough to tie up with restrictive licenses. We even get movies that have been out of print for years. Hal Hartley’s Trust is only available in the U.S. through Watch Instantly. Unfortunately I don’t have an XBOX 360 or a Roku, but I do have an Internet-enabled TV, and of course the “let’s hope someone comes up with some interesting way to use this” feature BD-Live on my Blu Ray player. So far both the TV and Blu Ray player haven’t gotten much use from their Internet connections. I’ve been hooking up my Macbook Pro to my TV via DVI-HDMI cable and an optical audio cable, but that requires all kinds of plugging and unplugging and doesn’t allow HD streaming through Watch Instantly. Both my TV and Blu Ray player are Panasonic, and neither of them has partnered with Netflix to allow streaming on their devices. And I don’t want to buy another device right now.

Today I learned that Netflix will be sending out special discs to PS3 owners that will enable them to use Watch Instantly through BD Live. Now the obvious question here is: why not my Blu Ray player too? What does that supercomputer PS3 have that my Blu Ray player doesn’t? Well, obviously the large hard drive and massive processing capabilities, but neither of those seem particularly necessary. I have a small amount of storage space available for BD Live material, and my Blu Ray player can obviously handle the processing necessary to play back HD video. Is there a technical limitation here, or is it a business limitation?

Previously Netflix had an exclusive relationship with XBOX 360, so opening it up to the PS3 is a big step. But opening it up to every Blu Ray player would be huge. It would paradoxically create a larger market for Blu Ray players while simultaneously reducing the market for the overpriced discs. Anything that makes it easier to get movies in the hands of consumers (for a fair price) is a good thing.


Cloud Backups

So it appears that T-Mobile has lost all the Sidekick personal data stored on Microsoft/Danger servers. This is bad news for the Cloud. I always assume that my data is safer in the hands of professionals. But apparently the Sidekick data wasn’t backed up? It got me a little nervous about the status of my 5 years of Gmail data, which I’ve always been content to leave up on the massive Google server system. I imagined my Gmail data existing in multiple locations in massive data centers all over the world, and it could never be lost. But I’m in a backing up mood anyway, so last night I used Gmail Backup to download all my messages.

I was watching SNL (typical of this season so far, it was almost entirely bad) so I wanted to stay in the living room. But I wanted to download the data to the desktop computer in my office. I decided to use the Screen Sharing built in to OS X. I logged in to my desktop computer using my laptop. Everything worked perfectly right out of the gate. Nice work Apple!

Offsite Backup

Despite once having three hard drives fail within a month, I’ve never been much for worrying about backups. Sure, when I edit a movie I generally back up the FCP project every day. I used to burn CD-Rs (I know, so quaint!) now I usually put it on a thumb drive, or just zip it up (very important! you save a lot of space) and email it to myself. That way Google keeps a copy forever. Even in that instance of multiple hard drive failures, I managed to avoid actually losing any data because I got everything off the drives before they failed permanently. So I haven’t run into that terrible situation where you suddenly realize you’ve lost days or weeks or years worth of work.

But I am getting older, and I realize I’m not going to live forever. Maybe that recognition of my own mortality is leading me towards some concrete backup plans. That, and the incredible dropping prices of hard drives. My first step was to buy a 1TB USB/eSATA external hard drive. I picked up a copy of SmartBackup, which lets me chose exactly what I want to back up, and does incremental backups from then on. It also allows me to browse through the backed-up files in Finder, which is important. I had multiple projects on multiple drives, and it was a simple operation to pick the folders I wanted and send them all onto the new drive.

I’ve been doing this for a few months now, but the drive’s physical proximity to the other drives is making me feel less secure than I’d like to. If there were a fire or electrical disturbance that caused one of the drives to fail, they could all go. And if anyone set off a giant pinch as part of a scheme to rob a casino, I wouldn’t be very happy. Although, that last one is unlikely, because there aren’t any casinos close Brooklyn. I looked into so-called “fireproof” safes, which generally only protect paper from burning. In order to really protect hard drives, you need to spend a lot more money than I was willing to spend. I considered online backup, but a quick calculation informed me that with my slow DSL upload speed, it would take around 6 months to upload everything I wanted to back up.

The simplest solution, of course, is a sneakernet. I’m going to buy another $100 drive, back up my backup drive and physically move it to another location. Problem solved.

How to Prepare a Film For the Sound Department

Traditionally, film editing has 3 distinct phases. You cut the picture. Then you cut & mix the sound. Then you “finish” by cutting the negative or doing an online edit. These days a lot of that work is combined. Sometimes your edit is actually at full resolution, so an online isn’t strictly necessary. Sometimes your sound editing can be done with the same software you edited picture in, and by the same person.

But other times you need the special expertise of a sound editor, and the special tools that only specialized audio software like Pro Tools can offer. So today I’m going to talk very specifically about the steps you should go through to prepare a film for hand-off to a sound editor.

  1. Talk to your sound editor. Ask him what he wants. Don’t be afraid to ask stupid questions. Maybe there’s even a checklist he can provide you. Talk before, during, and after preparation of these materials.
  2. Lock your goddamn picture! I can’t stress this enough. You must have enough time in your schedule to finish editing the picture before you give it to the sound department. Peter Jackson can afford to do endless conforms, including editing the picture during the mix, but if you’re reading this I can assure you that you can’t. It might seem so simple to just make a few changes, but those little changes that are so easy to make in your picture editing software ripple out into multiple hours of work for everyone down the line. Consider how many days of sound editing you’ve budgeted for and ask yourself if you’d rather have your sound editor spend that time (which is already too little, you know) working on the sound or working on implementing the picture changes you’ve made. Also sound editors don’t like conforms. You’re probably not paying these people enough as it is. Keep them happy.
  3. Break up your movie into reels. I’ll be honest with you. This one is dying out. There are a lot of times where this just isn’t necessary, but I’m going to talk about it anyway. Some of you might not remember this, but movies used to be shot on giant strands of plastic, and shown in theaters that way too. It turned out that putting a whole movie on one giant spool made it hard to move around, so they were broken down into 2000 foot reels (about 22 min). While your job no longer includes renting a truck in order to deliver all your editorial materials, you can still benefit from the wisdom of the ancients. If for some reason your film is shown on film, you’ll be setup for it from the beginning, but there are actually some good technical reasons to work in reels. If you happen to do color correction in Apple’s Color program, it has trouble with projects that have too many cuts. It will also help you get around the pesky OMF file size limits. And I find that it helps psychologically to be able to say during the mix “Reel 1 is finished” rather than “We’re 20 minutes into this 120 minute movie and we’re already in overtime.”
    A few tips for breaking down into reels: Keep it under 22 minutes. Don’t try to squeeze it right up to 22 either. Nothing wrong with going under 20. Often the first reel has to be shorter (1600 feet, 17 min 46 sec) to accommodate things like trailers.  Try to avoid having black at the head or tail of the reel (except for the head of the first or tail of the last) because projectionists might cut off the black bits if they’re not paying close attention. I once got an email from a projectionist at Sundance who just wanted to make sure we did it on purpose. Other projectionists won’t have your email address. The best place to end a reel is at the end of a scene that has quiet audio. If loud sounds carry over between the reels, there might be a problem. Probably a bit of a pop or click. Certainly don’t let any music cross over the change. But these days pretty much anything goes, since the reel change during projection will be frame accurate.
    Each reel starts at a different timecode. There are two different ways to do it. The more “filmy” convention is to start the first reel at 01:00:00:00, the second reel at 02:00:00:00, etc. The more videoish way is to start the first reel at 00:59:52:00, which puts the First Frame of Action after the 8-second countdown (see below) at 01:00:00:00. Reel 2 would start at 01:59:52:00, etc. Either way is fine as long as everyone is on the same page.
  4. Countdown with 2-beep at the head of each reel. Final Cut Pro actually comes with a great countdown. It’s on the install disk in the Extras/Head Leaders for Cinema Tools folder. You can use the already-generated ones or open up the project and adjust it to your particular frame rate and resolution. I also recommend turning off the stupid flicker. The countdown includes 2 seconds of black after the “2.” Depending on the timecode style you’re using that means your First Frame of Action is at 01:00:08:00 or 01:00:00:00. The key thing here is that there is a one-frame beep at the “2.” Put this beep on every single audio track in your timeline. That way when your sound editor imports all of the files you generate, he or she can tell right away that they are in sync because the beep happens on the same frame as the 2. If that doesn’t happen, you know you have a problem. Of course timecode makes this less necessary than it used to be, but it’s a nice simple way that a human can tell things are working the way they should.
    It’s an optional step for most workflows, but I also like to put a beep at the end of the reel. In the old days you would actually use a hole-punch on the frame exactly 2 seconds after the Last Frame of Action, along with a one-frame beep on every track of audio. I put in a virtual hole punch by making a one-frame white circle. This lets you know if any tracks have drifted out of sync for some reason. It’s unlikely to happen these days, but it certainly doesn’t hurt.
  5. Audio reference files. The QT you output will include a stereo reference track of the audio work you’ve done so far. Sometimes the sound editor will want the mix broken up into separate dialogue, effects, and music files. Just turn off the tracks you don’t want, and export the ones you do. Preparing these files can also help you organize your tracks better than the mess you’ve made during picture editing.
  6. All original audio files. Usually the sound editor will want these. If you shot double system you already have them ready to go, but if your audio came in with the video files, you’ll have an issue. The simplest way to generate this stuff is to select all your clips in a bin and do an audio-only batch export.
  7. Export OMFs. This is pretty easy. FCP & Avid both have simple methods of generating OMFs. You’ll have the option of setting handle lengths. This is the amount of audio media you want to include in the OMF before and after each cut. It gives you flexibility in the sound editing to extend audio to cover up seams, or to find bits of room tone to fill in holes, or any number of little tricks that will make life easier. Make the handles big. A minute is good. More if you can stand it. One thing that’s going to limit you is the archaic OMF standard which restricts the file size to 2GB; a number so large that people in the 90s couldn’t even count that high. In FCP you can only export OMFs with embedded audio, so if you have 24-bit audio, big handles, and a lot of tracks, you’re probably going to bump into this one, even if you’re only working in 20 minute chunks. The easy way around this is to simply turn off a number of the tracks (using the green dot next to each track) until you get the file size below 2GB. Rename the exported OMF so that it indicates which tracks are in the file, then turn off those tracks and turn on the ones you had turned off and repeat. You might have to do more than two OMFs. I recently had to export three or four OMFs per reel for a movie I was editing. If you’re working on Avid you have more options. You can actually export an OMF that only references the media, so the file size limitation doesn’t really come into play. Make sure you check with your sound editors before you do that though. They might want embedded audio. Also, in Avid if you’re working with certain media types you can only export AAFs. It’s pretty much the same deal, but without any file size limitations. Once again, check with your sound editor to make sure you’re generating the right kind of file.
  8. Generate QuickTime reference files. You may be working in 9K with 7:7:7 92-bit log color, but your sound editor won’t be impressed by that. Your sound editor is getting by fine on a G4 and a 500GB hard drive. As always, deliver what is requested, but what is usually requested is an NTSC DV QuickTime file. You can probably get away with 23.98 if you’re cutting with that framerate. There are a few things you can do to make things easier for everyone. Add a visual timecode track with the timeline’s timecode. Don’t make it too huge, and put it in a letterboxed area if you have the option. In FCP you should get Andy’s Timecode Generator, which lets you add a generator to a video track rather than applying it as a filter to a nested sequence. It’s definitely easier that way. Avid has that functionality built-in. If your footage doesn’t already have source timecode burned in, you might want to apply a Timecode Reader filter in FCP to all your clips. Double-click it, set the size and location, select all, and then drag it onto the clips. This can be useful if your video TC matches your audio TC and you’re looking for a particular piece of audio. It’s not always necessary.
    Export in the format requested, and include audio in the file.
  9. Audio EDLs. You may or may not need to make EDLs. Sometimes the sound department needs to replace the junky low-quality audio you were working with, although as always, this sort of offline/online workflow is less common now than it was a few years ago. It depends on your workflow. As always, ask, ask, ask. FCP can export EDLs. With Avid, use EDL Manager.

Ok, now you’re done. Put all this stuff on an external hard drive and get it to your sound editor. And remember that if you make any changes to the picture you’re going to have to do most of this all over again.

12-bit Color?

banding_gradients

I recently upgraded my editing monitor, since the 13″ Sylvania I bought for $50 in 2002 really wasn’t cutting it anymore. I’d been planning it for years, but since I edit outside of my office so often, I was putting it off until a job came along to will help me pay for it. That never really happened, but I did it anyway. I moved my 37″ 9UK Panasonic professional plasma into my office and mounted it on the wall so it’s not right up in my face and clients can watch it comfortably from the couch. I bought a new 46″ G10 Panasonic consumer plasma for the living room. I only really wanted 42″, but 46″ was barely any more money! It’s huge! It’s also 1080p, and actually has HDMI inputs, so I see a real boost in picture quality for Blu Ray discs. There’s a general consensus around the Internets that the 48hz mode for 24p input causes too much flicker, but I think it looks pretty good on most images. Bright graphics definitely flicker like a PAL CRT though. I’ve only watched a blu ray discs  with it turned on, so we’ll see how I feel about it after more testing.

Anyway, the real point of this is that in the course of my research I stumbled across the latest HDMI marketing gimmick known as Deep Color, which uses 12-bit-per-channel color (36-bit total, or 68.7 billion colors). Now I’m certainly a fan of high quality images, but I had never even heard of 12-bit video. I’ve mastered movies in 10-bit color whenever possible, which I thought was great. I’ve worked with plenty of 8-bit source material, and I’ve seen its limitations, but it still looks really good. There are always going to be people who want more though. And I guess 12-bit color is going to deliver it for us.

But what does this mean for content producers? I certainly don’t anticipate finishing a film in 12-bit color any time soon. A cursory search shows no widely available tape formats that can hold 12-bit color. HDCAM SR only goes to 10-bit. The Red One shoots 12-bit color, as do some other digital cameras, so theoretically a fully tapeless workflow could accommodate 12-bits through the whole process. But then how do you deliver it to consumers? I can’t imagine there are any cable/satellite signals even broadcasting 10-bit. The broadcasting trend seems to be going for lower data rates, not higher. Blu Ray in its current incarnation can’t pull it off, but some future form of digitally distributed media could. However, like cable and satellite, the trend is towards more compression and lower bit rates. 12-bit color files will be HUGE.  I can see where this could be a good thing, but it seems a little like 240hz LCD screens: a higher number that’s just used to justify increased prices.

Blu Ray Gets Worse

analogholeDon’t get me wrong. I love Blu Ray in concept. But there are some real problems, and most of them come from AACS and the studios’ RIAA-style campaign to make Blu-Ray a closed system. I’ve gone over my problems with AACS licensing fees in the past but today I learned that AACS is requiring Blu-Ray players manufactured in 2011 to only output SD over component, and in 2014 no analog outputs at all. That means you’ll only get HD video through HDMI, which will maintain the AACS copyright protection. Now, as most people know, AACS was broken several years ago. Anyone who wants to pirate & distribute Blu Ray movies can do it using simple digital methods. The analog hole is likely to be exploited only by people who have already bought the disc and are making backup copies or a copy for their buddy. These people are not destroying the Hollywood business model. They are movie enthusiasts. It’s FairPlay all over again. Have we learned nothing from the music business?
On a personal level, I have no HDMI cables in my home entertainment system. I run everything component. My TV is a couple years old, and doesn’t support HDCP over HDMI. My a/v receiver is component-only, because when I bought it three years ago, that was the only affordable option. Remember when you could buy a TV for a few hundred bucks and it would last for 20 years? Sure, looking back on it now they were terrible, but that’s not the point. My Blu Ray player is outputting 1080i59.94 video over component, and it looks great. I’m not recording that video to my computer and making illegal copies. I’d need to buy a card for that, and it would be a huge hassle. I’m an expert in video technology, and I consider it a nightmare. Who could possibly be exploiting this?

Apple and Arrogance

appleiic-case

I’m happy to hear that new MacBooks will have Firewire ports. It was a dumb idea to get rid of them in the first place, and Apple seems to have listened to its customers in this case. A concerned customer emailed Steve Jobs last year about the lack of Firewire in the MacBook, and Jobs responded “Actually, all of the new HD camcorders of the past few years use USB 2.” which is patently false. What he was referring to were the  consumer HD cameras that are gaining in popularity, but leaves out HDV, which is also rather popular. What it also leaves out is the vast legacy of firewire cameras still out there, not least of which is the venerable DV camcorder. And what about hard drives? Sure USB 2.0 can hold up fine editing DV, but if you’re planning to edit HD, even if your camcorder uses USB 2.0 for transport, you’re going to want a firewire hard drive while you’re editing.

This argument is old now, and it’s not an issue for people who didn’t buy the sans-firewire Macbooks, but it’s the arrogant attitude of knowing what’s best for people—and dropping legacy support—that drives me crazy. It happened to my beloved Apple II in the early 90s (ok, that one might have been for the best) and now it’s moving into my beloved MacBook Pro.

Apparently the new MacBook Pros don’t have any expansion slots. The old G4 PowerBooks had PC Card slots, like everyone else. Those were great, and were awesome for P2 card loading. Then the MacBook Pro went for the ExpressCard, which meant I need a slightly dodgy adapter for P2 card loading, but still works great. And if I ever did any work with SxS cards, they would work without an adapter. But now the MacBook Pros have a……. SD card slot?

The only word for this is downgrade. SD cards are media storage devices. Sure, they’re very popular, but you can get a USB SD card reader for $6 at Newegg. You know what you can’t get at Newegg? A direct connection to the PCI-Express bus. That means you can’t put in an additional Firewire bus for peripherals that require a dedicated bus, and you can’t get eSATA.

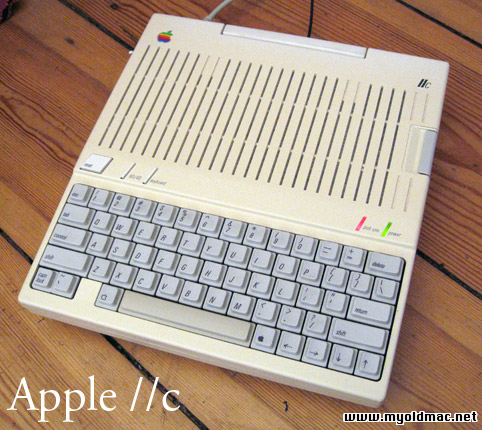
I’m sure there are lots of uses I’m not thinking of, but the point of giving direct access to the PCI-Express bus is that developers can come up with any crazy thing they want to and get some serious speed. Do you know what you can do with an SD Card slot? You can put SD cards in it. Sure the 17″ still has an ExpressCard slot, but have you ever picked one of those things up? They’re monsters. They’re about as portable as my Apple IIc was (it had a handle). If I wanted something that didn’t fit in my laptop bag and weighed a ton, I’d carry around my desktop computer. Who is Apple to tell me I’ll be fine without ExpressCards? I want options!

And finally I want to complain about those charming John Hodgman/Justin Long ads. I think they’re really well made, and Hodgman is a blast, but this idea that Windows-based computers constantly crash, and Macs are impervious to lock-ups is ludicrous. On a bad day I can get Final Cut Pro to crash 10 or 15 times (that’s on a real Mac Pro, not my hackintosh. The hackintosh tends to be very stable). I’m sick of the false idea that Macs are perfect and worth the extra cost because they’re more stable, and Windows is cheap and you get what you pay for. I think this is the worst one:

Are there “Meghans” out there who are looking for “fast processors” and are disappointed by the speed of new PCs? My girlfriend just bought a netbook that’s significantly faster than her old Thinkpad, which did everything she needed already, but has a bad battery and weighs a lot more. Computers these days are incredibly fast as long as you’re not an FPS-obsessed gamer (who is going to buy a PC anyway) or a FPS-obsessed HD video editor (who is going to need a Mac).

And let’s talk about Vista. I installed it recently, and it runs great. It’s a lot better than the barely-alive XP install I had after I tried to upgrade to SP 3. The only problem I’ve had so far is a deadbeat peripheral-maker who hasn’t made a 64-bit driver for my firewire audio interface. I’m fine using my soundcard though. I only really use the interface with Mac apps. And I understand it’s tough getting everyone on the 64-bit bandwagon. Has Apple released a real 64-bit operating system yet?

Perhaps I Was a Bit Ambitious

The movie I’m working on now involves two shows each running 5 simultaneous 1080p angles. The source material is AVC-Intra shot with 3700 Varicams. When I brought the footage into FCP, I converted to ProRes HQ because I thought our system could handle it. We bought a Caldigit HD Element just for this movie, and it’s a year-old 8-core Mac Pro. We played through both shows, watching all 5 angles at once and playing out 1080i through the Intensity Pro and never skipped a frame. However, once I started editing, trouble appeared almost immediately. Every once in a while a dark green frame would suddenly appear in the Viewer or Canvas windows, and FCP would usually crash immediately after. Sometimes it wouldn’t, but eventually as soon as I saw the green frame I would just save and shut down the program.

I went through driver updates on the Intensity and Element, tried rolling back QuickTime to version 7.5.5, and FCP to 6.0.4 (which is hard to do since Apple doesn’t let you download old update files. Save those things, kids.) Nothing helped. But the word on the street is that ProRes HQ is still pretty damn fancy. Cutting 5 simultaneous angles is a bit too much for some component of the computer to handle, and you’re unlikely to see any difference between HQ and SQ anyway. So I re-transferred everything to ProRes sans HQ. No dice. Still crashing every 15 minutes, although the green frame showed up less often.

On Friday I decided to use the Media Manager to transcode everything to 720p DVCPRO HD. It was estimating 26 hours of encode time when I left. This morning I arrived at work with a fully functional project with everything properly linked up, and it plays perfectly. I edited all day without a single crash or green flash. Even better, I’m able to play out the multiclips to the HD monitor at full quality. With ProRes I could only do medium or low. Hooray for DVCPRO HD! And hooray for a fully functional Media Manager!