Offsite Backup

Despite once having three hard drives fail within a month, I’ve never been much for worrying about backups. Sure, when I edit a movie I generally back up the FCP project every day. I used to burn CD-Rs (I know, so quaint!) now I usually put it on a thumb drive, or just zip it up (very important! you save a lot of space) and email it to myself. That way Google keeps a copy forever. Even in that instance of multiple hard drive failures, I managed to avoid actually losing any data because I got everything off the drives before they failed permanently. So I haven’t run into that terrible situation where you suddenly realize you’ve lost days or weeks or years worth of work.

But I am getting older, and I realize I’m not going to live forever. Maybe that recognition of my own mortality is leading me towards some concrete backup plans. That, and the incredible dropping prices of hard drives. My first step was to buy a 1TB USB/eSATA external hard drive. I picked up a copy of SmartBackup, which lets me chose exactly what I want to back up, and does incremental backups from then on. It also allows me to browse through the backed-up files in Finder, which is important. I had multiple projects on multiple drives, and it was a simple operation to pick the folders I wanted and send them all onto the new drive.

I’ve been doing this for a few months now, but the drive’s physical proximity to the other drives is making me feel less secure than I’d like to. If there were a fire or electrical disturbance that caused one of the drives to fail, they could all go. And if anyone set off a giant pinch as part of a scheme to rob a casino, I wouldn’t be very happy. Although, that last one is unlikely, because there aren’t any casinos close Brooklyn. I looked into so-called “fireproof” safes, which generally only protect paper from burning. In order to really protect hard drives, you need to spend a lot more money than I was willing to spend. I considered online backup, but a quick calculation informed me that with my slow DSL upload speed, it would take around 6 months to upload everything I wanted to back up.

The simplest solution, of course, is a sneakernet. I’m going to buy another $100 drive, back up my backup drive and physically move it to another location. Problem solved.

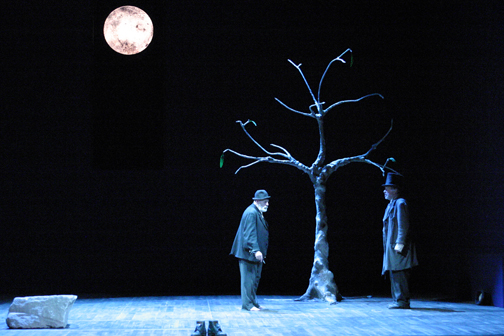
A Serious Man Is Absurd

waitingforgodot

I saw A Serious Man last night, and I can’t say I liked it as much as some of the Coens’ other films, but it certainly is a funny and discussion-provoking movie. I’ve seen some reviewers describe the film as Nihilistic, which is a philosophy I believe the Coens explicitly rejected in The Big Lebowski. The Nihilists in that movie are ridiculous crybabies. Say what you will about the tenets of National Socialism, at least it’s an ethos. I’m not an expert in the philosophic arts, but I think a much more accurate description of the movie—and a term that I don’t see discussed very often these days—is Absurdist. Nihilism rejects the possibility of meaning in the Universe. Absurdism finds it highly unlikely. It’s hard to find humor or drama in an absolute certainty in the meaninglessness of life. In an Absurdist world, the search for meaning behind events is considered absurd, because a person is highly unlikely to find it. That perfectly describes A Serious Man, and pretty much the entire Coen catalog.

YouTube Goes Extra Widescreen

YouTubeSuperWide

I don’t know what this is about, but when I watch 16:9 videos on YouTube, I have 50 pixels of black on either side of the video. You get the right aspect ratio if you switch to a smaller player by clicking on the –><– button on the upper right, but then the video is too small. I haven’t seen any announcement from YouTube about it, and only a few people around the Interwebs seem to be complaining. I would like to put my complaints out there. Widescreen was a good idea. Pillarboxing is not. It’s even worse with 4:3 videos, although to be fair, pillarboxing on 4:3 videos is expected and not a big deal for me)

YouTubeSuperWide2

A $200 Desk Chair

PurpleBeast

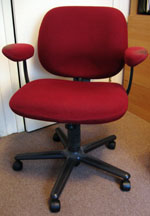
My mother bought me this $60 used purple foam desk chair my freshman year of college, and I kept it for 10 years. It was quite comfortable, but the springs were so worn out that it was almost impossible to keep it level. So I recently went on a quest to find a replacement that wouldn’t break the bank. Since most of you reading this are sitting on office chairs, I thought I would share some of the things I learned.

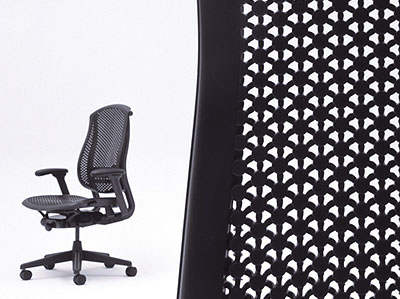
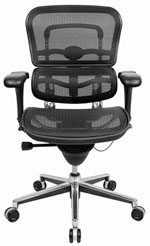
Herman Miller Celle

I started at the top. I’ve sat on my share of fancy chairs in fancy offices over the years, and I know how comfortable those Herman Miller chairs are. The Aeron is nice, but I spent this spring sitting in one of their newer and less expensive Celle chairs. Rather than a soft mesh they have an unusual network of plastic circles. Despite the harder look of it, it’s really quite lovely to sit in all day. I prefer it to the Aeron. I went to Design Within Reach in Brooklyn Heights to check out the other fancy chairs available. The Humanscale Liberty won Slate’s desk chair round-up a few years ago, and I can tell you it is quite comfortable as well. But at $1000 it was well out of my price range. Nothing at Design Within Reach was what I would consider “Within Reach” so I headed downscale.

bizchairmesh

I spent some time sitting on chairs at my local Staples, but nothing really felt sturdy and comfortable. It was also impossible to get a salesperson to help me out. I spent a lot of time online, and wasted a lot of energy trying to find an inexpensive all-mesh chair because I was sure that was the best option. I ended up ordering a Super Mesh Office Chair from Bizchair that was extremely solid, and well-constructed, but the metal frame around the mesh seat dug into the back of my legs because I was too short for it, and the mesh seat was surprisingly hard on the butt. The armrests also felt flimsy. They’re adjustable in a way that never really locks in place and they always jiggled a little when I used them to move the chair.

So rather than disassemble it and pay for the round-trip shipping, I sold it on Craigslist to a much taller man, for a slight loss.

At that point I realized that it is in fact necessary to sit in a chair before you buy it. So I headed over to Office Furniture Heaven on 19th St. in Manhattan. I spent about an hour moving from chair to chair, experimenting with every combination of mesh, foam, and mesh-foam. There was an inexpensive all-mesh Raynor Apollo chair with a plastic frame that appealed to me, but even though it had an adjustable-depth back, the frame on the seat still dug into my legs a little. It seems like cheap mesh seats are not a good idea. I could imagine what it would be like in 10 years. I suspected it would not hold up as well as the old Purple Beast did.

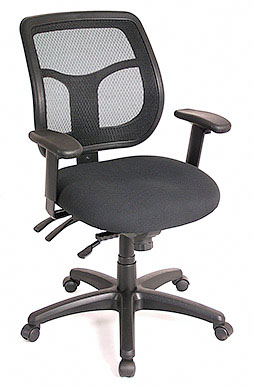
ErgohumanAlthough by that time I had settled on a $400 price cap, I did spend a lot of time sitting in a Raynor Ergohuman mesh chair. It is highly adjustable, comfortable, stylish, and feels like it will hold up well under lots of sitting. MSRP is over $1000, but you can get it online for less than $500. I probably would have bought the Ergohuman if Raynor didn’t also make an Apollo chair with a foam seat. It combined a surprising amount of adjustment with a comfortable seat and a $215 price-tag. In addition to the usual seat-height adjustments, there are very simple back-height, back-depth, and seat-tilt adjustments. The seat even tilts forward if you like that sort of thing. I’ve had it for about a month now and I’m very happy with it.

RaynorApollo

How to Prepare a Film For the Sound Department

Traditionally, film editing has 3 distinct phases. You cut the picture. Then you cut & mix the sound. Then you “finish” by cutting the negative or doing an online edit. These days a lot of that work is combined. Sometimes your edit is actually at full resolution, so an online isn’t strictly necessary. Sometimes your sound editing can be done with the same software you edited picture in, and by the same person.

But other times you need the special expertise of a sound editor, and the special tools that only specialized audio software like Pro Tools can offer. So today I’m going to talk very specifically about the steps you should go through to prepare a film for hand-off to a sound editor.

  1. Talk to your sound editor. Ask him what he wants. Don’t be afraid to ask stupid questions. Maybe there’s even a checklist he can provide you. Talk before, during, and after preparation of these materials.
  2. Lock your goddamn picture! I can’t stress this enough. You must have enough time in your schedule to finish editing the picture before you give it to the sound department. Peter Jackson can afford to do endless conforms, including editing the picture during the mix, but if you’re reading this I can assure you that you can’t. It might seem so simple to just make a few changes, but those little changes that are so easy to make in your picture editing software ripple out into multiple hours of work for everyone down the line. Consider how many days of sound editing you’ve budgeted for and ask yourself if you’d rather have your sound editor spend that time (which is already too little, you know) working on the sound or working on implementing the picture changes you’ve made. Also sound editors don’t like conforms. You’re probably not paying these people enough as it is. Keep them happy.
  3. Break up your movie into reels. I’ll be honest with you. This one is dying out. There are a lot of times where this just isn’t necessary, but I’m going to talk about it anyway. Some of you might not remember this, but movies used to be shot on giant strands of plastic, and shown in theaters that way too. It turned out that putting a whole movie on one giant spool made it hard to move around, so they were broken down into 2000 foot reels (about 22 min). While your job no longer includes renting a truck in order to deliver all your editorial materials, you can still benefit from the wisdom of the ancients. If for some reason your film is shown on film, you’ll be setup for it from the beginning, but there are actually some good technical reasons to work in reels. If you happen to do color correction in Apple’s Color program, it has trouble with projects that have too many cuts. It will also help you get around the pesky OMF file size limits. And I find that it helps psychologically to be able to say during the mix “Reel 1 is finished” rather than “We’re 20 minutes into this 120 minute movie and we’re already in overtime.”
    A few tips for breaking down into reels: Keep it under 22 minutes. Don’t try to squeeze it right up to 22 either. Nothing wrong with going under 20. Often the first reel has to be shorter (1600 feet, 17 min 46 sec) to accommodate things like trailers.  Try to avoid having black at the head or tail of the reel (except for the head of the first or tail of the last) because projectionists might cut off the black bits if they’re not paying close attention. I once got an email from a projectionist at Sundance who just wanted to make sure we did it on purpose. Other projectionists won’t have your email address. The best place to end a reel is at the end of a scene that has quiet audio. If loud sounds carry over between the reels, there might be a problem. Probably a bit of a pop or click. Certainly don’t let any music cross over the change. But these days pretty much anything goes, since the reel change during projection will be frame accurate.
    Each reel starts at a different timecode. There are two different ways to do it. The more “filmy” convention is to start the first reel at 01:00:00:00, the second reel at 02:00:00:00, etc. The more videoish way is to start the first reel at 00:59:52:00, which puts the First Frame of Action after the 8-second countdown (see below) at 01:00:00:00. Reel 2 would start at 01:59:52:00, etc. Either way is fine as long as everyone is on the same page.
  4. Countdown with 2-beep at the head of each reel. Final Cut Pro actually comes with a great countdown. It’s on the install disk in the Extras/Head Leaders for Cinema Tools folder. You can use the already-generated ones or open up the project and adjust it to your particular frame rate and resolution. I also recommend turning off the stupid flicker. The countdown includes 2 seconds of black after the “2.” Depending on the timecode style you’re using that means your First Frame of Action is at 01:00:08:00 or 01:00:00:00. The key thing here is that there is a one-frame beep at the “2.” Put this beep on every single audio track in your timeline. That way when your sound editor imports all of the files you generate, he or she can tell right away that they are in sync because the beep happens on the same frame as the 2. If that doesn’t happen, you know you have a problem. Of course timecode makes this less necessary than it used to be, but it’s a nice simple way that a human can tell things are working the way they should.
    It’s an optional step for most workflows, but I also like to put a beep at the end of the reel. In the old days you would actually use a hole-punch on the frame exactly 2 seconds after the Last Frame of Action, along with a one-frame beep on every track of audio. I put in a virtual hole punch by making a one-frame white circle. This lets you know if any tracks have drifted out of sync for some reason. It’s unlikely to happen these days, but it certainly doesn’t hurt.
  5. Audio reference files. The QT you output will include a stereo reference track of the audio work you’ve done so far. Sometimes the sound editor will want the mix broken up into separate dialogue, effects, and music files. Just turn off the tracks you don’t want, and export the ones you do. Preparing these files can also help you organize your tracks better than the mess you’ve made during picture editing.
  6. All original audio files. Usually the sound editor will want these. If you shot double system you already have them ready to go, but if your audio came in with the video files, you’ll have an issue. The simplest way to generate this stuff is to select all your clips in a bin and do an audio-only batch export.
  7. Export OMFs. This is pretty easy. FCP & Avid both have simple methods of generating OMFs. You’ll have the option of setting handle lengths. This is the amount of audio media you want to include in the OMF before and after each cut. It gives you flexibility in the sound editing to extend audio to cover up seams, or to find bits of room tone to fill in holes, or any number of little tricks that will make life easier. Make the handles big. A minute is good. More if you can stand it. One thing that’s going to limit you is the archaic OMF standard which restricts the file size to 2GB; a number so large that people in the 90s couldn’t even count that high. In FCP you can only export OMFs with embedded audio, so if you have 24-bit audio, big handles, and a lot of tracks, you’re probably going to bump into this one, even if you’re only working in 20 minute chunks. The easy way around this is to simply turn off a number of the tracks (using the green dot next to each track) until you get the file size below 2GB. Rename the exported OMF so that it indicates which tracks are in the file, then turn off those tracks and turn on the ones you had turned off and repeat. You might have to do more than two OMFs. I recently had to export three or four OMFs per reel for a movie I was editing. If you’re working on Avid you have more options. You can actually export an OMF that only references the media, so the file size limitation doesn’t really come into play. Make sure you check with your sound editors before you do that though. They might want embedded audio. Also, in Avid if you’re working with certain media types you can only export AAFs. It’s pretty much the same deal, but without any file size limitations. Once again, check with your sound editor to make sure you’re generating the right kind of file.
  8. Generate QuickTime reference files. You may be working in 9K with 7:7:7 92-bit log color, but your sound editor won’t be impressed by that. Your sound editor is getting by fine on a G4 and a 500GB hard drive. As always, deliver what is requested, but what is usually requested is an NTSC DV QuickTime file. You can probably get away with 23.98 if you’re cutting with that framerate. There are a few things you can do to make things easier for everyone. Add a visual timecode track with the timeline’s timecode. Don’t make it too huge, and put it in a letterboxed area if you have the option. In FCP you should get Andy’s Timecode Generator, which lets you add a generator to a video track rather than applying it as a filter to a nested sequence. It’s definitely easier that way. Avid has that functionality built-in. If your footage doesn’t already have source timecode burned in, you might want to apply a Timecode Reader filter in FCP to all your clips. Double-click it, set the size and location, select all, and then drag it onto the clips. This can be useful if your video TC matches your audio TC and you’re looking for a particular piece of audio. It’s not always necessary.
    Export in the format requested, and include audio in the file.
  9. Audio EDLs. You may or may not need to make EDLs. Sometimes the sound department needs to replace the junky low-quality audio you were working with, although as always, this sort of offline/online workflow is less common now than it was a few years ago. It depends on your workflow. As always, ask, ask, ask. FCP can export EDLs. With Avid, use EDL Manager.

Ok, now you’re done. Put all this stuff on an external hard drive and get it to your sound editor. And remember that if you make any changes to the picture you’re going to have to do most of this all over again.

12-bit Color?

banding_gradients

I recently upgraded my editing monitor, since the 13″ Sylvania I bought for $50 in 2002 really wasn’t cutting it anymore. I’d been planning it for years, but since I edit outside of my office so often, I was putting it off until a job came along to will help me pay for it. That never really happened, but I did it anyway. I moved my 37″ 9UK Panasonic professional plasma into my office and mounted it on the wall so it’s not right up in my face and clients can watch it comfortably from the couch. I bought a new 46″ G10 Panasonic consumer plasma for the living room. I only really wanted 42″, but 46″ was barely any more money! It’s huge! It’s also 1080p, and actually has HDMI inputs, so I see a real boost in picture quality for Blu Ray discs. There’s a general consensus around the Internets that the 48hz mode for 24p input causes too much flicker, but I think it looks pretty good on most images. Bright graphics definitely flicker like a PAL CRT though. I’ve only watched a blu ray discs  with it turned on, so we’ll see how I feel about it after more testing.

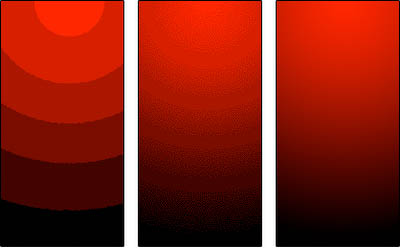
Anyway, the real point of this is that in the course of my research I stumbled across the latest HDMI marketing gimmick known as Deep Color, which uses 12-bit-per-channel color (36-bit total, or 68.7 billion colors). Now I’m certainly a fan of high quality images, but I had never even heard of 12-bit video. I’ve mastered movies in 10-bit color whenever possible, which I thought was great. I’ve worked with plenty of 8-bit source material, and I’ve seen its limitations, but it still looks really good. There are always going to be people who want more though. And I guess 12-bit color is going to deliver it for us.

But what does this mean for content producers? I certainly don’t anticipate finishing a film in 12-bit color any time soon. A cursory search shows no widely available tape formats that can hold 12-bit color. HDCAM SR only goes to 10-bit. The Red One shoots 12-bit color, as do some other digital cameras, so theoretically a fully tapeless workflow could accommodate 12-bits through the whole process. But then how do you deliver it to consumers? I can’t imagine there are any cable/satellite signals even broadcasting 10-bit. The broadcasting trend seems to be going for lower data rates, not higher. Blu Ray in its current incarnation can’t pull it off, but some future form of digitally distributed media could. However, like cable and satellite, the trend is towards more compression and lower bit rates. 12-bit color files will be HUGE.  I can see where this could be a good thing, but it seems a little like 240hz LCD screens: a higher number that’s just used to justify increased prices.

The Ain’t It Cool News Quote Con

Mike Judge has a new movie coming out this weekend, and Miramax (yes, they still exist and make movies) has done a pretty large ad buy on tv shows and websites that I frequent. Based on the advertising, the movie looks suspect, but so did Office Space, and we all know how that turned out. What is annoying me today is the quote they’re using in the ads:

extract_aicn2

Haven’t we as a society become way too sophisticated for this kind of blatant fakery? Maybe you could get away with this in the early 2000s, but this is 2009 Miramax! Ain’t it Cool News posts reviews from nearly any idiot who goes to an early screening of a movie and writes them an email. In this case, it’s someone named McVicker, who as far as I can tell has never previously written in to AICN. Now, we can argue all day about the value and relative merits of professional film critics, but those people develop a body of work that you can use to compare to your own opinions, and you can start to figure out whether you’ll agree with a particular critic based on their past writing. This McVicker fellow gets his name from the principal in Beavis & Butthead. That’s all we know about this guy. And I’m supposed to get excited because a single pseudonym says this movie is his favorite comedy of 2009? And notice that in the ad the quote is attributed to “—Aint (sic) It Cool News,” with no author name. Is it because “—McVickers, Ain’t It Cool News” looks… ridiculous?

In general when you see a quote from AICN, you can assume that the movie is rubbish, because it has about as much meaning as a quote from Earl Dittman, or one of those “CBS-TV” local news people. And if a quote from a more reputable source could be found, they would use that instead. But since it’s a pre-release quote, and because I enjoy Mike Judge’s movies, I’m willing to give the movie the benefit of the doubt.

Hard At Work

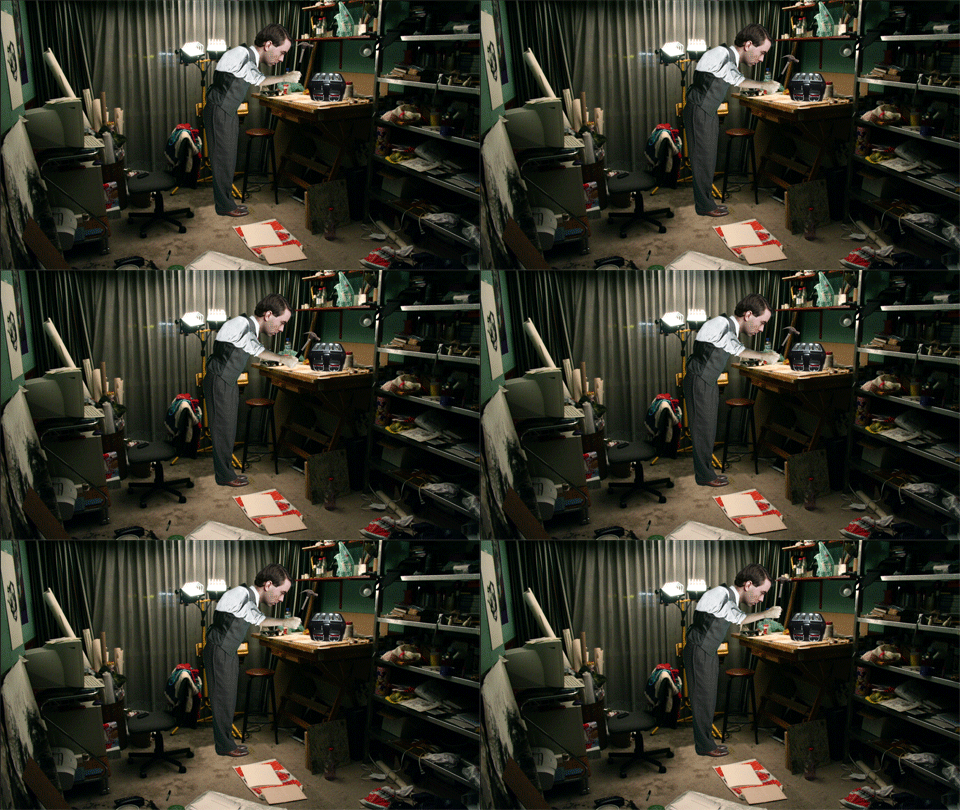
I’ve been getting a lot of paying gigs lately, but it’s no excuse for taking almost a year to finish the 2nd episode of Time Travellin’. In the past few weeks I’ve made some really good progress. I’m going for a much more complicated style this time around, including actual movement, and full bodies. Here’s a little taste.

Hammer-Loop