
Post-Production Simplicity
This is the first in a series of posts I’m planning to write about some things I’ve learned while editing Fay Grim. The process so far has been wonderfully simple and enjoyable and I want to write down the specifics to remind myself how to do it, and maybe to help some other people who stumble across this website.
Today I want to talk about keeping things simple. Fay Grim is a feature film which will be released in theaters, DVD, and on HDNet all at the same time. It cost a few million dollars, it stars Parker Posey and Jeff Goldblum and it’s the sequel to Henry Fool, a fairly well-known and well-liked film. That is to say, it’s not my last movie, which cost $2,000 and was shown at the Coney Island Film Festival. But in both cases I found that I had nearly complete access to everything I needed to make the movie without ever leaving the office, and without hiring dozens of support staff.
 For Fay Grim, the Soho Apple Store generously gave us a dual-processor G5, a 30″ Cinema Display, and a copy of Final Cut Studio.
Because of some unfortunate delays with our shipping company, that system didn’t make it to Berlin in time for the start of production. So the German Apple Store lent us a G5 iMac and another copy of Final Cut Studio, finally appeasing the grudge I’ve held against Apple since I was 10 years old and they abandoned my beloved Apple IIc in favor of the Macintosh.
 So I started this project with a lowly iMac. And it gave me no trouble at all. The whole offline edit could have been done on the thing if I was a more patient person than I am. Luckily the tower arrived a few weeks later and it ran quite a bit faster.
The movie was shot on HDCAM at 23.98 using the Sony F900, but I saw no reason to introduce complexity or expense by attempting to edit in anything other than DVCAM.  Sure, there are dozens of options for editing something with higher quality, but I’ve yet to hear a persuasive argument for any of them. FCP edits DVCAM with absolutely no difficulty. And a DSR-11 only costs $1500. Those are very persuasive arguments.
The HDCAM footage was downconverted to NTSC DVCAM at a post-production facility in Berlin with original and pulldown timecode burned in.
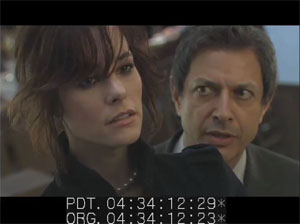
I did a batch reverse telecine in Cinema Tools once it was captured so we were able to edit at 23.98, the same speed and frame rate as the original tapes. It was very imporant to make sure the clips had no timecode breaks becase just one would mess up the cadence and make the reverse telecine screw up. I found timecode breaks were common whenever the camera’s power was interrupted. They weren’t big enough for the camera to start from 0, but there was usually a visual artifact to go along with it. Luckily it becomes really clear if there was a problem when you play the 24p footage on an interlaced monitor because the whole thing stutters like crazy.
The audio was recorded on an Aaton Cantar, which records up to 6 separate audio tracks to a hard-drive. The sound recordist gave me DVD-Rs at the end of the day that had separate 24-bit Broadcast Wave Files for each track of each take. Unfortunately Final Cut Pro doesn’t recognize the metadata (including timecode) that is embedded in BWF files, but there’s a lovely program called BWF2XML that converts the BWF files to MOVs and creates an XML wrapper to read in the clips with the scene and take information that was embedded during recording. It even combines multi-track recordings with separate files into single multi-track QuickTime files (requires OS 10.4). It made things very simple.
The timecode on the picture wasn’t synced with the timecode on the audio but since I was trained with those ancient sync block and Steenbeck devices, I didn’t mind syncing up the audio and video using a slate. And it’s fantastically easy with FCP. You just find your slate on the audio and video clips, mark an in point on each one, select both clips, and hit “merge clips” and now you’ve got a new clip with the audio and video in sync. This also provided me with an extra chance to catch clips that weren’t properly reverse telecined. While I was syncing up I always checked the timecode value of the slate against the burned-in timecode. It’s a lot easier to solve problems at this stage than during the online when you discover your EDL is all messed up.
That’s all for this post. I’ll write more about the process of actually editing the film later.
Leave a Reply
Want to join the discussion?Feel free to contribute!