A Stopgap Solution

I was working on a movie in Avid Xpress Pro (on Windows XP) recently and I figured it was time to finally get some equipment so I (and a client) could watch the video on an external monitor. A DV deck is the usual way. You hook up the deck to the computer via firewire, the deck translates the DV to analog, you hook your TV into the deck and you’ve got NTSC video. Trouble is, I have very little use for a deck. Most projects I edit these days come to me already on a hard drive. DV tape is obviously on its way out, and spending $2000 on a deck I won’t be using much longer seems a little silly.

I was hoping to get an Intensity Pro. I didn’t need to capture or output any tapes, so that seemed ideal since it could also handle HD. But then I remembered that Avid doesn’t play well with others. Avid only works with Avid DNA products like the Mojo. The Mojo is essentially a glorified digital/analog converter that also adds 2:3 pulldown to 24p video in realtime and retails for $1700. It’s worth noting that Final Cut Pro adds 2:3 pulldown for free.

sony-dcr-hc28192046.jpg
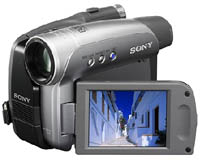
I considered a D/A converter, but they all run around $200 and don’t have any tape decks, in case I do need to capture a tape here and there. Eventually I decided that a cheap camcorder was my best option. First I got a $160 Canon camcorder. With Avid Xpress Pro I was getting a 16 frame delay and often drifting out of sync, which I assumed was because it was a cheap piece of crap. I returned it and got a $190 Sony DCR-HC28 since I’ve had such good experiences with Sony decks. I still get the 16 frame delay with the Sony camcorder, but I don’t have the drifting problem. I was working on a different project in Final Cut Pro, so I booted up the Mac OS to see what the delay would be. Turns out it’s only 2 frames, which is what I usually expect from FCP with a firewire deck. That really surprised me since it’s the same computer. From what I’ve read in online forums, the 16 frame delay is standard for Avid without a DNA like the Mojo. I’ve turned on desktop play delay, which keeps the video in sync, but it makes editing a bit more difficult.

I don’t have any plans to start shooting home movies, so I can’t say anything about the image quality of the camera. I can only assume it’s horrible.

Editing 24p footage at 29.97

In the past I’ve surveyed the many issues of editing 24p video in a 60i world. A recent comment on that page reminded me that there’s another option that I hadn’t discussed.

Shoot 24p. It looks great. Once you’ve shot it in 24p, you’re never going to lose the “filmic” quality of the motion that you get from shooting progressive frames. Because you can only get interlaced video on a DV tape, what’s on your tape is now interlaced, but it’s interlaced in the same way that The Matrix is interlaced when it’s shown on standard definition TV. It still looks like The Matrix, it doesn’t look like the 11 o’clock news just because it’s interlaced.

Editing in 24p can be tough. If you don’t really understand what you’re doing you can end up causing a lot of unnecessary trouble. So you can edit in regular old 29.97 NTSC. You probably won’t see the difference. The one time I see a problem with footage that was shot 24p but edited at 29.97 is playing on my HDTV. My TV is a progressive scan monitor. It automatically detects 3:2 pulldown and removes it from the video, which results in a nice progressive picture. This works best when the video has a continuous pulldown cadence. A film that is telecined has pulldown added in the same cadence throughout, so once the TV picks up the cadence, its work is done. The same is true for videos shot and edited in 24p. However, a video shot at 24p and edited at 29.97 has a pretty good chance (80% I think) of changing its cadence on every cut. So after every cut I see a few frames of interlaced video before the TV figures out the new cadence.

The good news is, nobody else notices this.

My advice is, if you’re going crazy trying to figure out how to edit 24p video, do yourself a favor and skip it. NTSC 29.97 works just fine.

2007 Editing Tech Wrapup

For me 2007 was the year of HD. I bought an HDTV, but more importantly, I edited a number of videos on my own computer in HD. It’s kind of old news for a lot of people, but it turns out DVCPro HD is a great format that you can play back from a regular old hard drive without any fancy RAIDs. In the past I’ve insisted on sticking with DV because I didn’t trust a regular old hard drive to reliably play back HD video. And at least on a feature film there’s always going to be an online assembly at the end anyway, so the advantages of working in HD are generally not as great as the hassles. One feature I worked on last year was edited with 14:1 compressed DV on a G4 Avid Meridien, so HD was beyond out of the question. It literally took an hour just to output one reel of the DV reference quicktimes for the sound editors. But despite the old-fashioned tech in the offline, we did the online in 4:4:4 1920×1080 at a post house, and it ended up looking terrific. I always say that in the end offline editing is just about generating a list of numbers for the online anyway.

But working in DVCPro HD has really opened my eyes. For one thing, it made my pretty nice 2-year-old AMD X2 3800 computer seem way too slow. Rendering times were unacceptably high. I’ve just upgraded to an Intel Core 2 Quad 2.4 GHz system with 4GB of DDR2 RAM and I’ve seen some real performance increases. Rendering titles is much improved, and realtime HD effects work really well. Of course, I’m still limited by slow hard disk speeds, but now I have 4 eSATA connections (2 built-in to the back of the motherboard and 2 from an SATA to eSATA bracket) which ensures that on the newer external drives I don’t have any Firewire interfaces slowing anything down.

All of the DVCPro HD projects I’ve worked on have been short, and came from P2 cards; my new favorite things. If there’s one thing that annoys me the most about editing, it’s real-time capture. It’s too slow!!! P2 cards copy faster than real-time, and generally have to be loaded onto hard drives during production, so in many cases I get a hard drive all ready to edit without having to load anything into the computer. This is the way of the future. In FCP there’s still some futzing around with conversion from the MXF format on the P2 cards to QT files, which seems like something that won’t last long. Avid loads MXFs without any conversion, which I find very cool.

We edited Blind Date using XDCAM. In this case it was PAL DV saved as MXF files to XDCAM discs, which are basically Blu-Ray discs in a cartridge. All I did was copy the files from the discs to a hard drive and we were ready to go. It was at least twice as fast as real-time capture, possibly faster. My favorite part was syncing up the 3-camera shoot. Everything had the same timecode, so it was a snap to group every bin using AutoSync.

The big new thing that I haven’t tried yet is Apple’s ProRes codec. I’ve done a little bit of testing and it seems to work really well and really fast, but I haven’t done any serious editing with it. It looks like I’ll have a chance in April when I’ll be editing HD video for an opera in Amsterdam with Hal Hartley. Everything will be shot in HDCAM and we’re going to capture straight to ProRes HQ and edit with that throughout the process. At the end it all needs to be converted to MPEG-2 for the playback hardware installed in the theater, so ProRes seems ideal. I will of course post more as I learn more.

Final Cut Pro Cue Sheet Program

I should have done this earlier, but here’s my distribution package for the FCP cue sheet generating script I wrote for Fay Grim. This script generates the old-timey audio cue sheets that were necessary in the old days when people mixed on dubbers and dinosaurs ruled the earth. They do not generate the music cue sheets which are often required delivery items in distribution contracts. You should really just suck it up and do that manually. If you’re working in Pro Tools and have the ability to export text versions of sessions (usually requires something like the DV Toolkit) then you should try Agent Orange.

These are the instructions (which are also included in the zip file)

  1. Upload the contents of the Zip file to an empty directory on a server where you can run PHP. Most web hosts allow you to run PHP. Give it a shot.
  2. In FCP export an XML file of the sequence you want to generate a cue sheet for.
  3. Upload the XML file to the same directory you uploaded the script to.
  4. In Safari (Firefox and IE don’t work) enter the url of the directory where you uploaded the script plus the text “?file=filename.xml” where filename.xml is the filename of the XML file you uploaded. For example: http://www.15framespersecond.com/cue_sheet/?file=Reel 5.xml will generate a cue sheet for Reel 5.xml
  5. Adjust the options to fit your needs, then print.
  6. If you’ve uploaded more than one XML file you can select them from the dropdown list at the top of the screen.

I only made the script for my own purposes and I hope some other people get some use out of it. I do not have the time or the interest to provide tech support so the script is provided “as is.” Feel free to modify the source code as you see fit.

HVX-200 Workflow

There is a lot of hearsay, rumor, and innuendo floating around about working with Panasonic’s fancy HVX-200 camera. I have fairly limited experience with it, but I thought I’d throw in my impressions of the best workflow options.

Shoot 720pn on the biggest P2 cards you can afford. Considering the astronomical cost of P2 media, we’re back in the old days where storage space is a limiting factor. Now, the sensor on the camera is 960×540, and it uses fancy methods to squeeze some extra resolution to get to 960×720 (the actual resolution of the 720pn footage). If you go up to 1080p24, tests have shown you do get a slightly better picture, but at the expense of halving the amount of footage you can fit on a P2 card. You’re already getting something really good at 720pn and unless you’re a fanatic about resolution you might not even see the difference. Shooting at 1080p24 also means the files on tape have 3:2 pulldown added in, which is just taking up space and you’ll have to remove the pulldown before you start editing.

Have a laptop on set with a PC card slot. There are a lot of products out there that will read P2 cards or hook up directly to your camera via firewire but I find them dodgy. I don’t like extra steps. The old PowerBooks (before Intel) had PC card slots, as do most PC laptops, although many of them don’t have firewire ports. (UPDATE: You can get a “Duel Systems” (sic) adapter to plug the cards into a MacBook Pro) Hook up a firewire drive to your laptop and you’ve got yourself a perfect transfer station. You might need some drivers, which you can get from Panasonic. Just pop the full P2 card out of the camera, put it in the card slot on the computer, then copy it to a clearly labeled folder on the firewire drive. Come up with your own folder system, but keep it clear and consistent like you would with camera rolls or tapes. Then erase the entire contents of the P2 card and put it back in the camera. You should have at least 2 cards so you can keep shooting while you copy. (Another update: According to Shane Ross, you can’t just delete the cards anymore, you have to use a P2 card formatter, which you can get from Panasonic.)

You need an extra crew member. Unfortunately you’re going to need someone who only pays attention to media management on set. Trying to split up the job can lead to lost footage, which is bad. The best person to have on set is an assistant editor or the editor. That way things can be organized exactly how they want it. If the post-production staff can’t do it, you’ll need an additional person who knows computers.

Make a backup. Look, hard drives crash all the time. And they’re really, really cheap. Buy an extra one and backup as often as possible.

Edit with new versions of FCP or Avid. P2 is bleeding-edge stuff. Don’t waste your time trying to make it work with FCP 3. It just doesn’t work. And I’m sure those upstarts like Premiere Pro and Vegas are just fine, but why are you making everything so difficult? Avid has the advantage of working natively with MXF so you don’t do any transcoding, but because there’s no tape name associated with the files there’s a lot of worry about what happens when things go offline. I haven’t had enough experience working with P2 in Avid to dismiss any of those fears, so proceed with caution.

24p Headaches

I got an email from my old friend Mr. Taj Musco last week. I made my first real movie “Is This the Pizzaman?” with Taj after my freshman year of college. It was shot on S-VHS and edited tape-to-tape at our local cable access facility.

Taj was having trouble with some footage he shot in 24p advanced that was getting all wonky when he made a DVD or output to DV. Taj is a smart guy, and he had troubleshooted like crazy, but he was stumped. I also used to see a lot of confusion about 24p on the Apple FCP forums when I used to frequent that place. There was one heartbreaking story of an assistant editor who had captured PAL tapes at 24fps thinking that the timecode would match their masters when it was time to online. They didn’t. Don’t do that. Edit at 25 fps.

Here’s the thing. Editing in 24p is endlessly confusing. Let’s start with the term 24p. It means two different things! It can mean 24.0 fps, which is the speed that film runs at, or it can mean 23.98 fps, which is the speed that NTSC video runs at. If you shoot any 24p on a video camera, you’re shooting at 23.98 fps. The exception to that is HDCAM format, which can shoot at 24.0 fps. But the only good reason I can think of to do that is if you’re mixing it with mostly film footage.

Let’s assume for the moment that you shot 23.98 video. Most of you reading this did that. If you didn’t shoot HDCAM or on an HVX-200 (a camera which will get its own post soon) then what you actually have is regular old 29.97 NTSC interlaced video.

“But! BUt! BUT!” You shout. “! Didn’t I shoot 24p? I want to be like a real filmmaker and junk.” Yes you did. But DVCPRO and DV tapes record NTSC or PAL video. What the camera does is the same sneaky trick that you do in telecine. It’s called pulldown. It takes those 24 frames and spreads them out into 30. It doesn’t just play them slower, because that would look like slow motion. Instead it duplicates some of the 24 frames in a set pattern. It’s beyond the scope of this post to explain how it works. Look up telecine in wikipedia. It’s fascinating stuff if you’re a huge nerd like me.

If you’re working in Final Cut Pro, you DON’T CAPTURE 23.98 VIDEO. You capture regular old NTSC. If you shot 24p “advanced” then you capture NTSC but turn on the check box for removing advanced pulldown. Then you EDIT at 23.98 because your clips have been converted back to 23.98 during capture. If you shot in regular 24p, then capture NTSC and use Cinema Tools to remove the pulldown. If all goes well you should be able to just do a batch reverse telecine and then reconnect your clips to the new ones.

It’s a really good idea to check your clips at this point for any remaining interlaced frames. If you’re playing out to an NTSC monitor you’ll see it right away. It stutters like it’s duplicating half-frames, which is exactly what it’s doing. You’ll see it right away. If you’re poor and don’t have a way to output to an NTSC monitor, just open up some of your clips in Cinema Tools and step through the video using the left and right arrow keys. Try it on a part of the clip with lots of movement. If you see any interlacing at all you’ve done something wrong. Don’t start editing until you see only progressive frames.

And just to clear up some confusion, there is no real difference between footage shot in 24p advanced and 24p regular. It’s only a question of the workflow outlined above. You can easily blow up either one to film assuming you’ve removed the pulldown properly.

Macs and PCs, Avid and FCP

Computer software tends to create partisans. You have your Mac people and your PC people. Internet Explorer people and Firefox people. Avid people and Final Cut people. Well I think they’re all crazy. As for the Mac and PC camps, I use them both every day. I have to use Macs because the creative world is swamped with them. I use a PC I built at home because a comparable Mac would be double the price. And now, thanks to Apple’s switch to Intel and some very clever people, my PC is also a Mac. I like them both. They both work just fine for me and I never have trouble doing the things I want to do in either system. The exception that led me to install OS X on my PC is Final Cut Studio, because Apple doesn’t make a Windows version.

FCP and Cinema Tools are two really fantastic programs. Xpress Pro is also great, but these days a freelance editor needs a Final Cut Pro system. And there is a certain flexibility and openness that Avid’s media management doesn’t allow. Obviously that can be a curse if you’re not careful. Avid keeps track of your media for you, which is great but it means everything you do with your media has to be done through Avid. With FCP you can fiddle around with your media in other programs and FCP will re-connect with a minimum of fuss. But really, it’s 6 of one half a dozen of the other. In the end I see no reason to edit in one system over the other. I lean towards Xpress Pro these days because it’s still annoying to have to reboot into OS X just for FCP.

But Cinema Tools and Compressor bring me over to the OS X part of my computer sometimes because they’re by far the best software I’ve seen for QuickTime encoding. Compressor’s batch features are great and really simple to use. And I haven’t found any software aside from Cinema Tools that can change a QuickTime file’s frame rate with one click and no waiting.

Sound Editing Fay Grim

Against my better judgment, in addition to the picture editing (see earlier post) I agreed to do the sound editing for Fay Grim under Hal Hartley’s direction. Sound editing is not my first love. I have some ability with it, but it doesn’t get me as excited as picture editing. Usually it makes me bored and crazy. But I got a lot more money out of the whole thing as a result, so that was nice.

As we were editing the picture I kept thinking about how we would make the switch to sound editing. We had an old 1st generation MBox so we could get Pro Tools for $75. But there’s a built-in limitation in all hardware-based sound playback. You can only get X number of sound tracks out of the thing before you have to do a mixdown. In the case of the MBox, that’s 24 tracks. Since we were working with a lot of stereo effects and ambiences, that brought us down to about 14 or so distinct sounds. That’s not enough. I also had problems with stuttering sound and overloaded CPUs, which seemed strange considering we had a top-of-the-line (at the time) dual processor G5 and the MBox was several years old.

So I started looking at software-based solutions. I tried Soundtrack Pro, which came with Final Cut Studio. It seemed like a perfectly capable multitrack sound editor, but it had big problem. It doesn’t export OMFs. Soundtrack Pro was a dead end, unless you brought it back into Final Cut and exported the OMFs from there. More of a cul-de-sac I guess. I didn’t like that idea. It was too cumbersome. I like simple things.

The simplest thing I could think of was doing the sound editing in Final Cut Pro. I thought about it. And thought some more. And the only thing I could come up with that would make that worse than any audio-specific editing system is that it can only edit whole frames, you can’t make those real precise subframe edits. But frankly, that didn’t bother me one bit. And it never came up. And all the filtering and manipulation of sound would be done in the mix, so the only thing we needed to do was put the sounds on the right frames.

The big advantage to sound editing in FCP is that we never had to lock the picture. The picture editing could last for as long as the sound editing and there was no transferring back and forth between programs and no need to worry about making mistakes in the process. With a nice powerful processor, I could play the majority of our sounds without rendering because even if I had 72 tracks (I believe that was the final number) I was never playing 72 sounds at the same time. And when I did need to render, it took only a few seconds.

Finally I exported OMFs. I did two for each reel thanks to that pesky 2 GB file size limit, one with the first 36 tracks and one with the second 36. Then I combined the OMFs in Pro Tools and brought Pro Tools sessions to the mix.

I also spent a week making a program that would generate cue sheets from Final Cut Pro timeline. Hal likes cue sheets, and I was used to them from my student films which were mixed on dubbers like in the old days. The limit of my programming knowledge is using PHP to generate web pages, so I made a PHP script that could parse FCP XML files into cue sheets. It’s not perfect, and it only works in Safari (try printing it with Firefox and you’ll see). Once we got to the mix we realized it was completely useless because everyone could see the Pro Tools layout, and I had laid out the tracks in an intuitive way so we always knew where everything was. Anyway, if you have any need for FCP-generated cue sheets, let me know.

Post-Production Simplicity

This is the first in a series of posts I’m planning to write about some things I’ve learned while editing Fay Grim. The process so far has been wonderfully simple and enjoyable and I want to write down the specifics to remind myself how to do it, and maybe to help some other people who stumble across this website.

Today I want to talk about keeping things simple. Fay Grim is a feature film which will be released in theaters, DVD, and on HDNet all at the same time. It cost a few million dollars, it stars Parker Posey and Jeff Goldblum and it’s the sequel to Henry Fool, a fairly well-known and well-liked film. That is to say, it’s not my last movie, which cost $2,000 and was shown at the Coney Island Film Festival. But in both cases I found that I had nearly complete access to everything I needed to make the movie without ever leaving the office, and without hiring dozens of support staff.

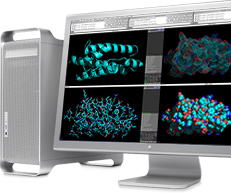
For Fay Grim, the Soho Apple Store generously gave us a dual-processor G5, a 30″ Cinema Display, and a copy of Final Cut Studio.

Because of some unfortunate delays with our shipping company, that system didn’t make it to Berlin in time for the start of production. So the German Apple Store lent us a G5 iMac and another copy of Final Cut Studio, finally appeasing the grudge I’ve held against Apple since I was 10 years old and they abandoned my beloved Apple IIc in favor of the Macintosh.
AbsolvedSo I started this project with a lowly iMac. And it gave me no trouble at all. The whole offline edit could have been done on the thing if I was a more patient person than I am. Luckily the tower arrived a few weeks later and it ran quite a bit faster.

The movie was shot on HDCAM at 23.98 using the Sony F900, but I saw no reason to introduce complexity or expense by attempting to edit in anything other than DVCAM. CheapSure, there are dozens of options for editing something with higher quality, but I’ve yet to hear a persuasive argument for any of them. FCP edits DVCAM with absolutely no difficulty. And a DSR-11 only costs $1500. Those are very persuasive arguments. Read more